Webinar

Spine Navigation and Navigated Drill-Guide Technique: Accuracy where it matters without any compromise

Tópicos
Neurocirurgia
Trauma Surgery
Idioma

English

Compartilhar esta página

Descrição

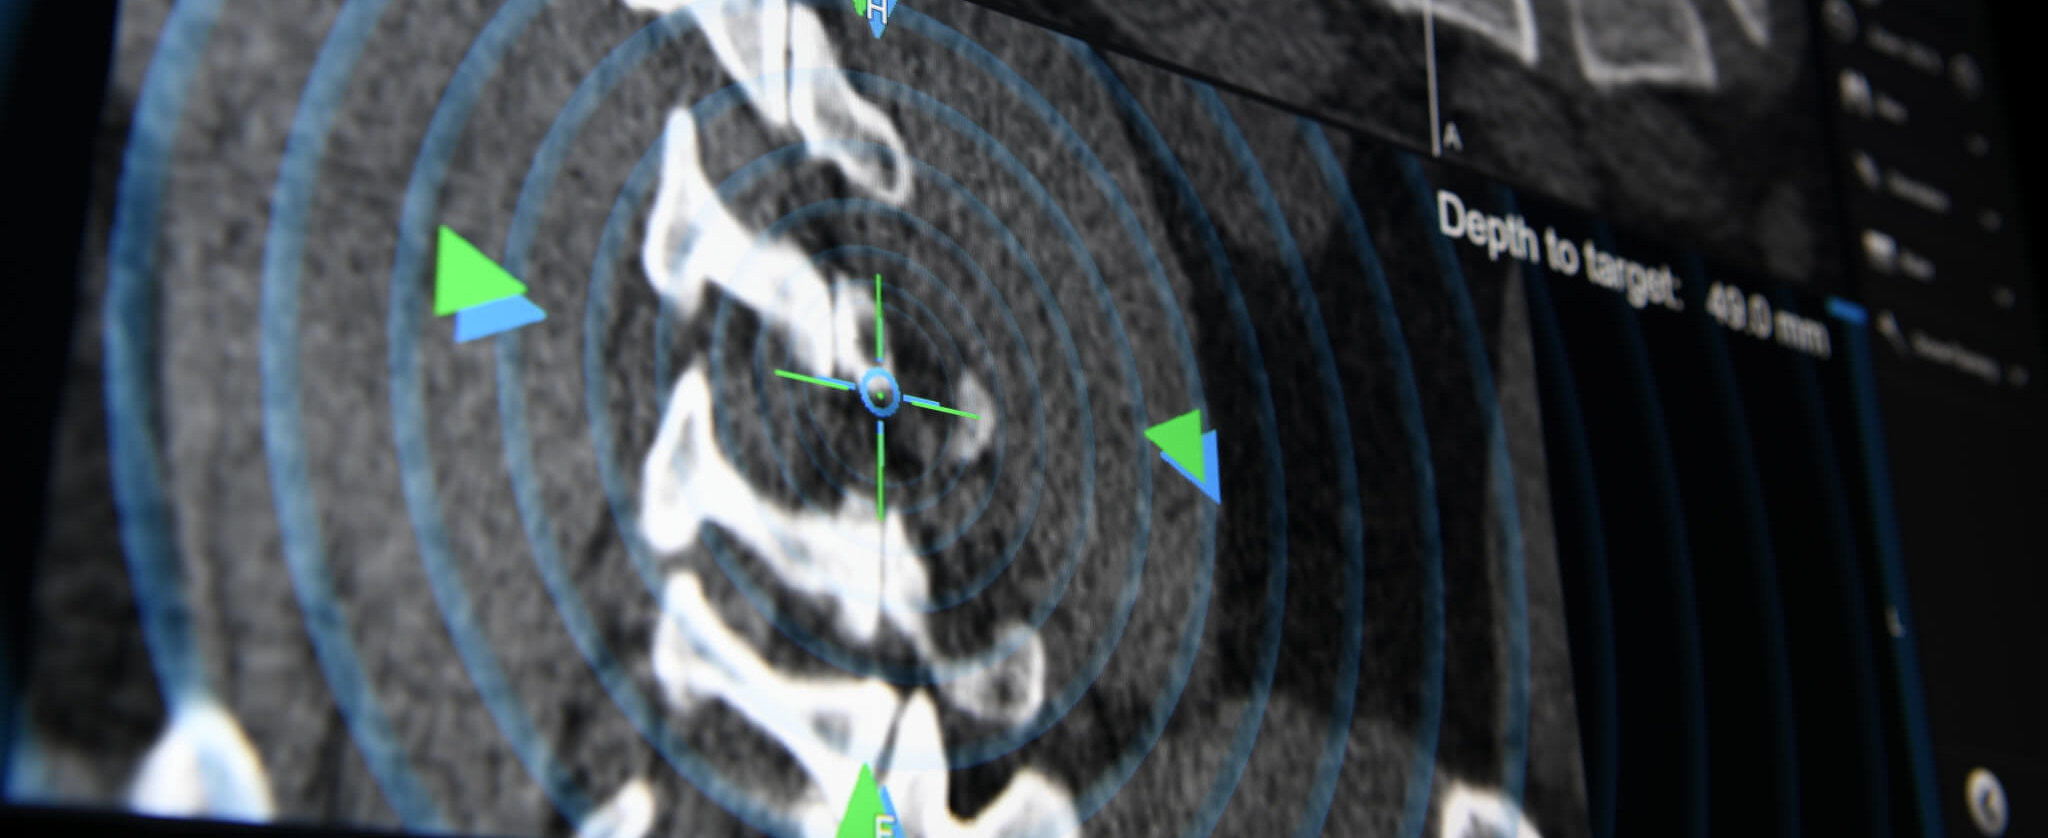
Brainlab invites you to a live webinar: “Spine Navigation and Navigated Drill-Guide Technique: Accuracy where it matters without any compromise” on June 10th at 5:00 PM (CET) hosted by Prof. Krieg on his successful use of spine navigation and its different application using navigated drill guides and image registration.

This webinar will cover:

  • The use of navigated drill guides in combination with various image registration methods
  • Detailed case reports including cervical, MIS tumor and long construct
  • Pitfalls of navigation and how to avoid typical errors to gain the best possible surgical result

We look forward to meeting you online!

Language | English

In case you can’t join the webinar, it will be recorded and shared afterward.

Participation is free of charge.

The views, information and opinions expressed during this presentation are the speaker’s own and do not necessarily represent those of Brainlab.

Palestrante

Sandro Krieg, M.D.
Sandro Krieg, M.D.

Professor for Neurosurgery at TU Munich, Germany

Moderador

Matthias Brundobler

Brainlab, München

To watch the webinar, please enter your contact data Please confirm that you would like to register for this webinar

    We offer our webinars free of charge. In return we ask for your permission to receiving promotional emails.

    Informações sobre o processamento de seus dados pessoais podem ser encontradas na política de privacidade da Brainlab

    Are you interested in an easier and faster way to register for upcoming events?
    Create a Brainlab ID account and save time before the next session. Gain access to MyBrainlab Online Services for more related event and webinar recommendations.

    Agradecemos por sua inscrição! Você pode visualizar o vídeo agora.

      To join our webinar free of charge, please confirm that we can contact you with related promotional material in the future.

      Information on the processing of your personal data can be found in the Brainlab privacy policy

      Thanks for your registration! You can now view the recording.

      Video Transcript

      Matthias: Good afternoon, everybody. Good evening, or good morning, I mean, depending from where you’re calling in. Very welcome to our webinar, “Spine navigation and navigated drill guide technique,” presented by Prof. Sandro Krieg. It is a pleasure to have you all here today. My name is Matthias Brundobler. I’m clinical marketing manager for spine in EMEA.

      I would like to introduce our today’s speaker, Prof. Sandro Krieg, head of the spine department of the neurosurgical department at Technical University Hospital in Munich, Germany. He started to work at the university hospital in 2009. In between he has done studies abroad in Los Angeles, London, Harvard Business School, San Diego. So, he started 2009 at the neurosurgical department, and they have a 10-year history of spinal navigation at the neurosurgery department. The talk today will focus on the navigated drill guide technique for spine procedures. Thank you very much, Sandro Krieg.

      Dr. Krieg: Thank you for the introduction. So, the rationale for spine navigation. Why should we do it? And why we proceeded to do it. The precision is actually really high, and you have less or no radiation exposure if you operate with spinal navigation, which means you also get used to operate without any lead, for instance. So, also, most setups we have enable intraoperative implant verification. So you know at the end of surgery that everything is fine, and you don’t need to do any kind of redo surgery.

      There was one study done some years ago, and also our department where we all wore radiation markers, and we measured the radiation exposure to the patient, but also to surgeon. And what you see here is that without navigation in the left column, at the chest you have 10% of the original radiation exposure compared between navigation and standard lumbar instrumentation. Even your eye, and that’s really important because you might not get any kind of cancer, but you can also get a cataract by increased eye dose.

      The other part is here, the cumulative patient dose. And also with navigation, there we use the 3D C-arm, your correlated patient dose is cut by half. Also, the learning curve was investigated some years ago, and you see here the different intervals of training. And what we could also show here is that your mean average time for surgery to place one screw goes down very quickly, and this is like a three months’ interval all the time here. The learning curve reaches a steady state very quickly.

      The other part is the placement of the screws. So that’s [inaudible 00:03:20] by Robbins classification, A and B. In some cases, if you do, like, complex cases for deformity or also a lot of thoracic one, you can even have C, which is still okay. So this rate of 80 or around 95 is pretty good. So, around these three intervals, you reach a pretty good steady state. Even at the second interval, you reach a pretty good steady state of your accuracy of your screws.

      So, what has been done, this is one review actually and there have been a lot of studies done on the accuracy and what was comparatives, the conventional fluoroscopy, 2D navigation, that’s also something what existed and sometimes exists still, and that we know now the 3D fluoroscopic navigation. And what you see here is that your accuracy rate, of course, from Robbins classification 2, A and B, is highest with a 3D navigation.

      So, we in our department use quite a lot of different modalities. We have Medtronic O-arm, we have two ceiling-mounted curves, and one mobile curve. We have two 3D C-arms, one Arcadis and one Ziehm, and this Phillips sliding gantry iCT, and the Cirq. We do all pedicle screws by definition. All pedicle screws below C2, we do navigated, but not, of course, lateral mass, and also C2 usually depends on the surgeon, navigated or freehand.

      With our setup, we’re actually very flexible. What we also starting now is that you can also use…when you put in the standard registration marker called Universal AIR in your Medtronic O-arm, you can actually use your O-arm for Brainlab navigation as well.

      So, our objectives today is the decision making, which kind of imaging suits such surgery most, the drill guide workflow, which means how you need to think differently, what is different, the pitfalls, what can you do wrong? Because you can do something wrong. And, also, passive and active robotics in general. So, we use the navigated drill guide and blunt K-wires. We have all screws cannulated and fenestrated, so we don’t have any uncannulated screws. And we do control scan after each screw placement or revision.

      So, we use a lot of different manufacturers depending on the system, what you do, a cervical spine, or lumbar spine, or if it’s a tumor case or not. So, with this setup you’re extremely flexible. You can change your screws and don’t need to change anything else in the setup. So, considering imaging. There are 3D C-arms. This is an Arcadis, which is already kind of old, but still okay.

      We have the Ziehm 3D C-arm, and what you need to know is that your quality…I mean, it’s a small device, but your quality is not as good. You’re very flexible, you don’t need a lot of space, but the quality is not good. You have the O-arm, which is draped completely. That’s really, really good. You can use the O-arm with a scanning position or parking position. So you can do very quick scans, and you have a considerable improvement of imaging quality at least. And you can have CT solutions. There are also various ones.

      Patient is draped, and you pull over the CT, and you have really excellent results. So these are, like other CTs, really excellent results in the imaging. And if you just want to remove even without instrumentation, any kind of bone tumor, for instance, like here with a navigated chisel in the sacrum, or here in L4. Also for your reception control, you need such resolution.

      And with such imaging, you pretty much know that you resect everything. With this marker here, you can actually use every imaging quality you have with the Brainlab navigation because you just put it inside your field, you do your scan, and these X-ray markers get then registered by the scanner [inaudible 00:08:15] software. That’s how we use our iCT as well.

      So, I did this table here which actually had the…I wanted to show with this why you should change or choose which kind of modality. So, region match is something different, of course. That’s not a imaging quality. We use it for cervical spine as registration. So you have no radiation, it’s not spacy, you have a little bit more registration error, but it’s really, really accurate on the cervical spine. It’s a little time-consuming, and you can’t do MIS. So, for cervical spine, it’s optimal because you have a pre-op navigation scan. You do just your matching and registration, and that’s it.

      A 3D C-arm is not spacy, you don’t need additional radiation shielding in your room, and that’s a really key thing. If you wanna do a semen augmentation or a kyphoplasty, or whatever, you can also use it very easily. And, therefore, if you do TLIF or PLIF with X-ray, or costotransversectomy, which I skipped…I usually do it just visual or sometimes then with a final 3D scan, comes pretty handy.

      Your resolution is not as good. You need to train your staff to do the proper positioning because it’s not that straightforward. You have a lot of artifacts in MIS. So it’s optimal for cemented screws, and also if you do some other of those procedures, or if you do like a short segment instrumentation of the lumbar spine, for instance.

      The O-arm also doesn’t need additional shielding. Your resolution is not perfect, but good. It’s easy to use. You can save your scan position and your park position. So, with a sterile glove, you can even use it your own if you need to. Usually, you can even take a regular table. Scans are very quick. It’s expensive. You need a lot of space. It’s really huge. With cement, it’s not that good because you can’t get into the device very easily. Artifacts are still a problem, but it’s okay. If you do a longer instrumentation, it’s already good. For osteotomies, it’s also good.

      iCT, perfect resolution, easy to use in regular table, but you need additional radiation shielding. Costs are high. Space is a lot, you saw it in the room. You can’t do pretty much plain X-ray. So if you wanna do plain X-ray, you need to have another C-arm in your room, which also means for cement. You need to have radiologists and radiology tech, at least in German legislation and most European. It’s perfect for long instrumentation if you do very long ones. You can do this all with one scan and one registration. It’s perfect for MIS as well.

      Now because it’s new, there’s also the Loop-X, and the Loop-X has some thoughts behind it. So it’s a big, big can gantry, which is really large. So you can also do a semen augmentation in it. And I just marked here the options and the advantage it has, and in red, the disadvantages. So, additional radiation shielding, you don’t need it.

      For cement, it’s also perfect. Here, as well, on the right for the O-arm, it gathers all those positive things. Artifacts are also not as much. It’s not spacy, but since it needs to drive out from the table, you need to rethink your room design, and you need to think about the costs. It’s more costly than the 3D C-arm. But you can do plain X-ray, and you can do very excellent 3D imaging.

      So, drill guide workflow. The workflow is totally different to the one you know. So, using the drill guide, you have this here, that’s the drill guide, and you use the power drill. And then, in the hole of the power drill, you just place manually a blunt K-wire. So it’s not a sharp one, it’s a blunt K-wire. That’s important.

      And then some people do use a navigated screwdriver, but it’s very long. It has a lot of joints. And as you will see, when you place the screws, your registration will go sideways and really become inaccurate. So if you use a navigated screwdriver, the screwdriver might not show you the accurate spot where you actually are. So you have a kind of feeling of a false safety.

      There are actually navigated awl, so navigated Jamshidi as you see here. But since you need to put a lot of pressure on it, you induce a lot of movement. I will show it to you in the next slides why I very much dislike this combination here.

      So, comparing both, navigated drill guide, it’s a completely new setup if you’re not used to it. It requires a power drill. It’s actually completely flexible with the K-wires because of the navigated screwdriver, is dependent on the manufacturer. You have less movement between the segments as most of the navigation is about this key point. No movement after the registration. The haptic feedback is something you need to get used to, and I will tell you later.

      Traditional navigation means you have known tools, you have a pedicle access needle, and requires a navigated screwdriver, with the disadvantages that I told you. You have much more movements, much, much more between the segments, but you have your known haptic feedback.

      So, I told you it’s not straightforward, what can you do wrong? And why you should, and why I want to advocate for the use of a navigated drill guide. So, the rationale to use any kind of navigation is that your anatomical preparation can be reduced. You don’t need to expose all the bone, but the main problem is when you do a registration scan intraoperatively, you create a virtual reality for yourself, and you see it on a navigation screen. And this virtual reality needs to match with the actual reality during drilling and K-wire placement.

      So after the K-wire is placed, it’s all safe because the screw follows the K-wire, which means you need to do everything, that the inter-segmental movements are reduced, which is a potential for assistance systems. We come later to this part. But your inter-segmental movement needs to be reduced, and the accuracy of navigation, it’s all about that. So, if you do, like, a one-segment instrumentation, or two-segment, you can do quite a lot of things wrong and it will still fit. But if you don’t look at the inter-segment movement, you shouldn’t blame actually the device and the software if your screws go in the root or somewhere else.

      This is a classic example. And I can show you exactly what happened there. And you see such pictures all around when the colleagues send you some pictures from all around the world. So, in this picture here, the surgeon placed the screws here on the right side, and pushed a lot on the vertebra, I bet, and the vertebra column turned a little. While you’re pushing on the side, it turns to the side. And you still think that your navigation is accurate, and you place your navigation and your screws, and you go to the next level and you still think that’s a nice convergence, right at exact spot.

      And on the left picture here, you still think it’s proper, but actually your vertebra is not where the software shows the vertebra is. It’s somewhere else. And then you hit here the segmental artery, or the root, or something else. So, avoiding such inaccuracy, use anatomical landmark additionally. For instance, if you do open thoracic, you still open your entry points. Open them and you’re safe.

      The other part, if you do MIS, with a drill guide, you can feel the bone. You can feel where the bone goes and where your bone is. You can feel your transverse process, and you very much know where you are as the entry point. While you’re drilling…I’ll show you a picture later. You drill through this very quickly because that’s a compact bone.

      And when you go through the compact bone, you then turn very slowly because then you feel that you are in the pedicle. And only with a little drilling, you’re already entering the whole pedicle. If you hit the compact bone again, then it doesn’t go forward that easily, and you’re safe because you know you don’t hit or you exit the pedicle if it goes smoothly.

      The same with the K-wire. I always push the K-wire a little inside afterwards, and I feel that the [inaudible 00:18:11] bone is a little breaking, and you’re inside the [inaudible 00:18:16]. No pressure. So no pressure with a drill guide. You put the drill guide softly on the bone, you drill, and put in the K-wire. Then you go to the next vertebra and do this again and again. So you put in all K-wires first, and then all screws. That’s important.

      So, there should be no movement between scan and drilling, which means your patients need to sleep really. They shouldn’t breathe on their own. And if your anesthesiologist messes it up, a patient starts breathing on his own, and is, like, almost moving or strong ventilation, that’s not good, especially a thoracic spine. At a cervical spine, you need to clamp the instrumented vertebra, so the vertebra where you want to put in your pedicle screws. That’s which you need to register, at least those with vertebral artery.

      So, I usually register down to C6. Each vertebra, I put in a screw. And then because C7 is already very broad, and T1 as well, so you check with pointer if the accuracy is still, kind of, okay. And then you can still put in the screw in C7 without new registration, of course. But otherwise, above, you shouldn’t do this because the movement is really high. At the thoracic and lumbar spine, you should put the clamp on the spinous process in the middle of your instrumentation, that you don’t have that many segments on each side which could move.

      The other part is thoracic spine reduce the ventilation to 300 cc. If you have, like, a big, big guy, you should have 350 maybe. The anesthesiologist can do this very easily. They increase the frequency maybe. And you can tell them, because if you know you put in 10 screws, you tell them, “As soon as you see 10 K-wires in the patient, you can put the ventilation to normal back again.” And that’s what they can do on their own then. So, this is actually a very nice slide and movie. So I go through this by hand.

      You see here the drill guide and how it’s placed here on the entry point at the cervical spine. Here’s the drill. And, also, one catch, if you put down the drill guide on the bone, you go with the burr on the bone, and then you lift it a little, because if you put the burr on the bone, it goes a little in. If you turn then, your drill guide can go away as well, and get inaccurate. So start drilling and then you approach the bone. So your drill guide really stays at the spot.

      So, here on the left, you actually see a case I did, like, some weeks ago, one and a half months ago. And we did T4 to L5 with one scan, with one registration MIS. What you see here, I opened T4 to T8. I did open them because I wanted to see the entry points as well, and you see here the curve. So, it was a [inaudible 00:21:50] fracture. You see the curve here. You don’t get the rod.

      And you can use two rods and connect them in between, but if you wanna use one rod, you couldn’t do this last part fully MIS, and it’s safer if you have such a long distance. If you have your entry points, you can’t be that wrong. So, T4 to L5 is possible with one scan, quickly takes you two hours, you have all screws in.

      So, what you see here on the left first, you see here how I drill quickly, and then I go in slowly, and that’s what you also see here. You put in the burr, and then the K-wire comes. So this is also something. Some of the K-wires have a structure on one side. And if the structure is on one side, the screw sticks at the K-wire, and you can push the K-wire, and that’s why I see in this movie, then I turn around the K-wire, because the nurse gave me the wrong one side.

      So you put in the K-wire until here, deburr 25 millimeters. And then you see here I push it a little, go through the lamella, and you feel it. Then you bring in the screw 2 centimeters, so your trajectory is already unmovable. It’s already how it should be. And then I remove the K-wire, and then you bring the screw in. So this means that your K-wire can go here outside the vertebra because you remove the K-wire already before you bring in a screw.

      What you can also do if you’re used to putting it freehand, you can even…during drilling, sometimes when I know the tip of the screw reaches this area here, the vertebra, I already do some conversion still. So I pull my screwdriver, I pull a little to the side and I have more convergence by putting the trajectory inside. So this means, as you saw it here, the navigated screwdriver doesn’t make it any more accurate.

      Let’s go quickly back here to this part. What you see also here that the vertebra moves. You bring in the screw, your vertebra moves. And you put in one line of more screws, your vertebra turns a little more and more, and it gets totally inaccurate.

      So, looking at the accuracy of pedicle screws, all navigated, it is a little older because it’s [inaudible 00:24:55] literature review. You accuracy you’ve got from Robbins classification A and B is extremely high. It’s 97%, 96%. So, navigation has considerable value if you use it as standard. So you shouldn’t only use it in your tricky cases, because then you do a tricky case and all your staff is just loaded with getting this thing done. So you need to do all cases.

      There’s actually no proper study and good study available which shows any robotic assistance or navigated non-robotic as a comparison until now, what brings me now to the next chapter. So, now the beneficial effects of robotics are due to navigation, so that’s why all robotic systems right now are also navigated-based, and that makes sense. We come to that. But what do the robotics do? They increase standardization.

      So, you can do it a little more standardized because you’re not having a drill guide on yourself, and your segmentation of the screws and the trajectory can be done in a standardized way, the best way even in a automatized way.

      So we go to the robotics. Why using any spinal systems robotics? It’s more about standardization and the accuracy. So, we started with this mechatronic part of the Cirq, which can hold your drill guide in this position you wish to, which is also very nice for the C-spine because it’s really rigid and it holds it yourself. So, this is from a movie we did, “The Presenter [SP] System,” which we published then actually in “Neurosurgical Focus.” You put it in here, you place it, and then it just holds your position.

      The new part here which now is evolving is that you have this active part which which follows a predefined trajectory. So you drape this very regularly, and you put it above…I will show you a slide later. You put it above the vertebra, and then this anterior part here positions it correctly to your previous segmented screw trajectory.

      And, by the way, your screw trajectory is even segmented automatically, so you don’t need to measure all your screws. You just go through the screws, which have to be pre-planned for you by the software, and you just say, “Okay, I confirm this trajectory, or change it.” And on the screen in the OR, your nurses already see which kind of screws you wanna use, because you can do this and you can use the software on each computer in your department. It’s [inaudible 00:28:07] based.

      So, this here, it’s kind of a target 8. So you place the head of the Cirq until you see here the green okay, so it’s in the range of the active part. And then in, like, one or two seconds, it shows you your trajectory, and gets a fixed position, and you just use the drill and drill there. And then your nurse already knows on the screen. You don’t need to communicate in any way again, or you can misunderstand it. You just see the screw. It’s already prepared usually. I already prepare all my screws, so they are on the wall in the OR, and the nurses can already see all the screws.

      Another part which I just want to mention, this is something which is coming up using augmented reality and MIS. We already actually use this setup when we try to have the Zeiss Kinevo, you can use as an exoscope, but you can also navigate it. So, you can actually use with the 3D goggles. You can compare and build this together with your navigation. And this is here your trajectory of the screws, your pre-segmented vertebra. And you see even here on the skin, then on the screen with your 3D goggles, and you can place your MIS incision and your screws MIS. This is actually the level where your Kinevo is focused to.

      So, concluding this part, navigated pedicle screw placement has, at least my mind, and in my view, and by experience, a really high value because you’re also really, really fast. If you have a standardized workflow and doing just a trauma case with four screws, it’s really, really fast, or even long constructs are just much more handy. You have a considerable reduction of radiation exposure, especially if you do MIS.

      I usually don’t wear any lead. We also start now doing the anterior surgeries which we are very used to in a navigated fashion because then, as well, you don’t wear any lead, you have no radiation exposure for yourself and your staff. Your spinal navigation therefore actually offers a whole new approach to many cases.

      The robotics, in my mind, increase the precision and then the standardization because you have now already pre-segmented trajectories, which you can yourself plan with optimized trajectories. And this is also the only advantage some studies showed, that you have less upper facet joint violations if you do it with a robotic system, which means you plan your trajectory beforehand and the robot then places it perfectly. And it’s not that you have problems with the soft tissue during surgery to say, “It might fit, anyway.” The robot doesn’t do this.

      Anyway, each surgeon and team needs to find the optimal solution depending on imaging and navigation system, and what you use, but still, please don’t push too much on the vertebra or use a system in which you only can do one or two levels, and then wonder why it takes you hours to do, or why if you do four or five levels, you run really into problems and having misplaced screws. It’s misuse and not to blame the system.

      Coming to the last point, I hope today I showed you that the surgeon needs to understand the proper use of spinal navigation because mostly it’s a misuse. And in most times, when I thought, “Man, the software might be wrong,” usually it was right and I was wrong.

      So, to sum up, accuracy with and without robotics. The image quality of the scan is really important. I showed you already. And there are a lot of systems which you can do easy imaging of the low thoracic and lumbar spine, but if you go higher, cervical thoracic or cervical, it gets more elaborate. The planned trajectories are crucial. The registration method depends where you use which one. The tracked instruments, of course.

      The clinical workflow, where you place the reference array, how you apply pressure to the vertebra, what you use as haptic feedback. You need to change your way you feel haptic feedback, of course, how you use K-wires. And, again, I know that usually orthopedic surgeons, especially in the U.S., for a K-wire, they understand you have a sharp K-wire which you burr with a drill directly somewhere as you do for dental screws, for instance. No, it’s not. It’s a blunt K-wire which you bring in your already done burr hole.

      And, also, you need to learn how to deal with long constructs. I hope I showed you some tricks today. And it’s so handy, and quick, and safe if you do all those instrumentations like this. That’s easy thing with really one scan. And you have the proper scanner, you can also do this large screws here as to [inaudible 00:34:07] into one scan.

      If you use a robotic system, this doesn’t need to be a big tool. There are a lot of big tools outside. The only thing it needs to hold is your drill guide, and shows you your trajectory. And since you’re all surgeons, you roughly know your trajectory, so it doesn’t need to, kind of, avoid that you use some kind of crazy trajectory. It’s just a positioning to show you the perfect 5 or 10 degrees you sometimes need. So, coming to that end, I’m looking forward to some questions. If you have questions after this webinar, you can also write me an email here below. Thank you very much.

      Matthias: Thank you very much, Prof. Krieg, yes, for you great in-depth presentation about spinal navigation with your experiences over the last, yeah, 10 years, and the way you do it now. And what you just said, I’m really sorry I forgot to ask everybody to, like, send questions via the chat, possibility to organize, and panelist. But before maybe questions come in, I have one question.

      I mean, you showed a very long construct, like the thoracic lumbar construct with the…I think it was like [inaudible 00:35:37] ankylosing spondylitis patient. And you did it with one registration. So you did, let’s say, 10 or 8 levels in one registration. How would you proceed or how would you do that on the cervical spine? If you would have, like, a long-construct cervical spine going to the thoracic spine.

      Dr. Krieg: I mean, you need to think about only the segmental movement. So, if you do, for instance ankylotic spondylitis patient, all vertebra which are already fused because of the disease, that’s totally fine to have them on one clamp. But if you use like a mobile fracture of the cervical spine, for instance, C5, you need to clamp C4, do a region match, and then you go to C6, do region match, put in those pedicle screws then. And, also, there two K-wires, left and right, then screws, then the other vertebra, and then you do your control scan.

      Matthias: Okay.

      Dr. Krieg: The movement is extreme. If you see this…I mean, one scan in our OR…I think we should publish on the video, you see even if you bring in the screw, how this all moves. It moves so much. You see this with a blunt eye very much.

      Matthias: Yeah. Sometimes you see videos with a [inaudible 00:37:05] field and one registration using on the cervical spine, which I think is, like, not understandable. And then there’s also a lot of surgeons using two pins on the iliac crest for lower lumbar spine. In your presentations, most of the cases you use a reference base or reference clamp on the spinous process. What is your way? When do you use what?

      Dr. Krieg: Well, actually let’s say on the lower lumbar spine you can’t do then much harm, roughly saying, because the vertebra are big. If you hit or if you get close to any kind of spinal canal or root, usually they slip away. So, a lot of people do a lot of things and it, kind of, works.

      You can use the reference array on the pelvis. You can do this. It’s no problem if you do, like, L3 to S1, but it literally depends if you have tiny pedicles, or a young patient with a fracture maybe in between even. I am more comfortable to put the clamp in the middle that I don’t have that much segments, plus if you use a reduced ventilation then, also you don’t have that much movement. But if you have it on the pelvis, and L3 already moves quite a lot, so you have a lot of movement already in between.

      It usually works, but if you wanna have a good feeling with a high accuracy, let’s say it’s a difference of if you need to revise 1 in 50 screws, or 1 in 5. So it works, but your rate of intraoperative revision of screws is increasing, the more you don’t take that much attention to your accuracy.

      Matthias: Okay. Let me just quickly…yeah. How do you see the risk that K-wires migrate? Because, like, years ago there was, like, a lot of discussion about K-wires migrating to the anterior wall, or through the anterior wall of the [inaudible 00:39:39] body, and, I mean, you’ve also mentioned the U.S., that in the U.S. they are more careful about that. They don’t like K-wires that much. How do you see that migration of K-wires, like, through the anterior wall of the [inaudible 00:39:55] body, or overall migration?

      Dr. Krieg: I mean, we do hear it depends 2 to 5 dorsal instrumentations a day since 10 years navigated with these K-wires. I’ve never seen any issue, nothing. Never ever. And the thing is you drill 25 millimeters, you pin in the K-wire, bring in the screw which already slips along the K-wire. But even if it doesn’t, you bring in a screw 2 centimeters, you remove your K-wire, which means the longest your K-wire can get is 45 millimeters, which is 25 plus 20, which it usually doesn’t. So it can’t. Even if you try, it can’t.

      Matthias: And you’re using a blunt K-wire. So, even if you would [inaudible 00:40:53] the risk of penetrating the anterior wall would still be very, very small.

      Dr. Krieg: Yes. Even in, like, very osteoporotic patients, I’ve never seen any issue.

      Matthias: Okay. Any more questions, quickly? Okay. No more questions. So, thank you very much, Prof. Krieg, for your great presentation. Sorry, there’s one more question. You really do not miss a navigated screw. So, more or less, you really don’t miss navigating screws. I mean, this is also…

      Dr. Krieg: You mean a navigated screwdriver?

      Matthias: Yeah. I mean, this is a lot of discussion. I mean, you talked a lot about in your presentation today. But if I talk to, like, surgeons at conventions or meetings, a lot of surgeons want to navigate screwdrivers. What do you think about that?

      Dr. Krieg: I mean, there are a lot of pros and cons. Again, if you do one to two segments, you can do a lot wrong, but even then, you have a movement. If you bring in your screw with a screwdriver, you have movement because you push a little and it turns and moves, which means your registration goes sideways.

      If you’re at the last screw, your screwdriver, if it’s navigated, it doesn’t show you the reality, which means your screw is somewhere else anatomically as it is on the screen. So the only thing which brings this solution is that it, kind of, can bring you to the point where you change a trajectory to the wrong direction, or to a direction you can’t control actually. You don’t know it.

      And the other thing is being pragmatic, you need to have a screwdriver for each different manufacturer, or even worse, you need to choose your manufacturer from the availability of a navigated screwdriver. The other thing is usually a lot of the screws have different lengths. You need to adapt your length all the time. So you need to have a [inaudible 00:43:33] mirrors all the time on your navigation, and you need to tell her, “Okay, now it needs to be 45. Now it’s 50. Now it’s 40.”

      I mean, when I use the navigation, and I measured them beforehand, so if I do it with a regular drill guide, and it’s 45 to 55 millimeters, the screws I wanna bring in, I tell them usually, “Show me 50 millimeters, and I know if it’s short or longer.” So it’s unpragmatic to change it, like, every time because it’s so fast. I mean, how long do you need to bring in the screw? It’s like one, two minutes, and then you have to wait until someone is changing that. You can do this, but from a practical point, and also safety point, it brings the false conclusions to yourself.

      Matthias: Okay. What are the pros and cons of navigating many different implants? I mean, you showed a list of, I don’t know, five or six vendors you’re using. I mean, if you also include navigation, what are the pros and cons of that?

      Dr. Krieg: I mean, one thing is you shouldn’t change everything. So, when you change to navigation, you should stay with your implants you and your nurses are used to. That’s one part, because it’s pretty hard to train your nurses to new implants. And, for instance, with Globus, you need to have Globus implants then. So you have a new system, plus everyone needs to adapt to the new screws.

      And the other part is, I mean, there are upcoming things. We use carbon screws for tumor cases now because you can do better imaging afterwards. They don’t come with navigated screwdriver, so we use them there. We do a lot of cervical spine and cervical thoracic, so you have sometimes even the same surgery. In larger cases, you have two different implants. This comes by, you have better preferences. Of course, you can use one manufacturer, but everything has its pros and cons.

      Matthias: And to standardize with drill guide and only K-wire, it’s much easier for the whole team?

      Dr. Krieg: Yes, because, I mean, it’s so complicated already what you need everything. And there, you just need the K-wires and what implant comes in, that’s all right. And no one needs to register the screwdriver. Also, it’s not that stiff because it has a lot of joints, so the screw actually moves a little and then still even not accurate. So I personally think it can be even dangerous and it doesn’t really help if you start getting used to not using it, but you just need to try.

      Matthias: Okay. I have one more question, I got it via WhatsApp from Dr. Ivanov from UK. Let me just quickly read it out. “The system would not allow to ask…okay, my question to Sandro, with regards to robotic guidance in C-spine, I’m surprised it is so much praised. You well-mentioned that it provides very rigid trajectory while C-spine is very flexible. What would be your preference for C-spine pedicles group? Surgeon navigation guidance or robotic navigation guidance.” It’s Marcel Ivanov from UK.

      Dr. Krieg: I know quite…actually, it doesn’t matter. What’s pretty cool is actually even when the Cirq was on his mechatronic arm, having the rigid drill guide holder, that was really, really good for cervical spine because you don’t push that much, it just stays inside. If you do it properly, it doesn’t matter. And, I mean, we did a lot of training and a study, also, in the cadavers [SP] on the cervical spine. Even with the first surgery, you were really safe and quick. So I think it doesn’t make a difference.

      Matthias: Okay. I mean, this is what also you were talking about, that the overall accuracy, whether it’s navigation or navigation with robotic, the overall accuracy is most probably not higher.

      Dr. Krieg: The other point…

      Matthias: It’s standardization.

      Dr. Krieg: The robotics brings you to the proper entry point. So, if you get lazy during surgery and think, “It’ll still work. It’s not optimal, but it’ll work.” I mean, every one of us knows this moment. The robot doesn’t take this. So your pre-op, pre-segmented or planned trajectory is the one the robot wants to choose, and will choose. So if you ask me what I feel more comfortable for myself, I usually know I stick to the plan, but if you ask me, “Give it to a hundred surgeons on the planet,” and you want to be operated from each of them, I maybe would choose the robot because it’s more standardized.

      Matthias: Okay. Yeah. Thank you very much for all the participants, and special thanks to you, obviously, for your great presentation, great question and answer. And the number of participants minus during the question and answer by one, so it was, like, I think, very great question and answer after a super presentation. Thank you very much. Nice evening to everybody, and thank you.

      Dr. Krieg: Thank you very much. Everyone who wants to see navigation is invited to Munich.

      Matthias: To Brainlab or to your hospital?

      Dr. Krieg: Depends on you. Now, hospital, of course.

      Matthias: Thank you very much.

      Dr. Krieg: Bye-bye.

      Matthias: Bye.

      Related Webinars

      FSN Webinar#2
      Digital HealthNeurocirurgia
      Functional Neurosurgery Webinar #2 | Image Guided Planning & Referral Network Improvement

      Join our webinar series 'Road to ESSFN' to learn how clinicians from Europe are using advanced technology to better visualize patient anatomy for the treatment of movement disorders and epilepsy. In partnership with Boston Scientific.

      Jibril Farah, MD
      Harith Akram, MD, PhD
      webinar1
      Digital HealthNeurocirurgia
      Functional Neurosurgery Webinar #1 | Improving Workflow Efficiency with Modern Technology

      Join our webinar series 'Road to ESSFN' to learn how clinicians from Europe are using advanced Brainlab technology to better visualize patient anatomy for the treatment of movement disorders and epilepsy patients. | In partnership with Boston Scientific.

      Emile Simon, MD
      Peter Reinacher, MD
      02Blurred_lights_full
      Image Guided SurgeryCranial Surgery+ 3
      Ultrasound Navigation: Confidence in Tumor Resections

      Brainlab invites you to a live webinar, “Ultrasound Navigation: Confidence in Tumor Resections”, at 4 pm CEST on August 3. This session is hosted by Dr. Aliasgar Moiyadi, MD, at the Tata Memorial Centre, Mumbai for Treatment Research & Education …

      See more upcoming webinars

      Register now